 PL
PL ENG
ENG RUS
RUS UA
UA
Raspberry Pi - HD camera
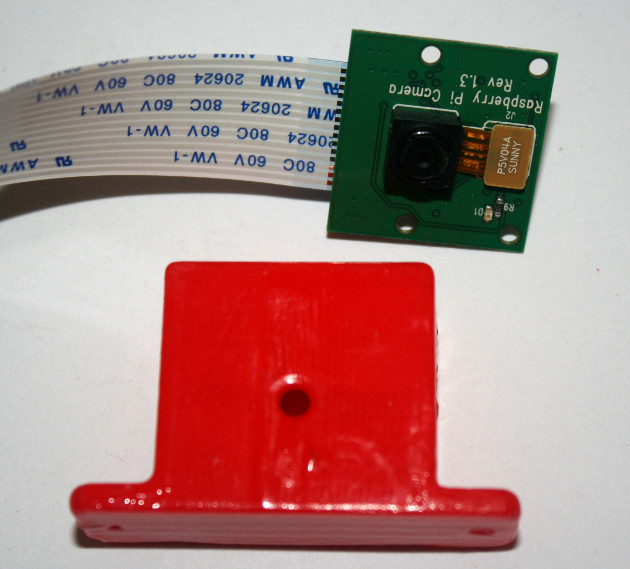
Fig. The camera with the enclosure designed for it.
And now a really nice toy - a FullHD camera. The processor contains a floating point unit that can encode a video stream to the H264 standard. Getting the camera running comes down to enabling it in raspi-config and plugging it into the socket on the board near the Ethernet connector. We need to install netcat. Mplayer may also come in handy. So we issue the following commands in turn:
sudo raspi-config - to start the Raspberry configuration tool and enable the camera.
sudo apt-get update - as usual, to download the lists of available packages
sudo apt-get install mplayer netcat - to install the software
Once the packages were correctly installed on the Raspberry, I downloaded software for the Windows machine on which I wanted to watch the camera image. These were the same programs as on the Raspberry, namely netcat and mplayer. I unpacked both into a common directory. I started them by going to that directory in Total Commander and issuing the cmd command, that is opening a command line. In the command line I entered:
nc.exe -L -p 5001 | mplayer.exe -fps 31 -cache 1024 -
On 64-bit versions a different command can be used:
nc64.exe -L -p 5001 | mplayer.exe -fps 31 -cache 1024 -
The first run installs fonts and so on, so it takes a moment. We will also be asked whether to make a firewall exception for the program. The application should of course be allowed to access the port. On the Raspberry I entered:
raspivid -t 0 -o - | nc IP.OF.THE.PC 5001
where IP.OF.THE.PC is the IP address of the computer on which we want to watch the camera image. The
picture from the camera should appear on the computer screen and on the monitor attached to the Raspberry. Streaming
is of course possible too, and can be watched
with the popular VLC program.
To do that, we enter the following on the Raspberry:
raspivid -o - -t 0 |cvlc -vvv stream:///dev/stdin --sout '#standard{access=http,mux=ts,dst=:8090}' :demux=h264
From that moment a video stream is available on port 8090 of the RPi. It can be viewed with VLC, for example, but also with SMPlayer, which uses mplayer.
A camera is one of many peripherals that can be attached to a measurement system. If you need a device that combines image acquisition with measuring other quantities, see what we can design for you.
Copyright ©2026 systemypomiarowe.pl.